


Description
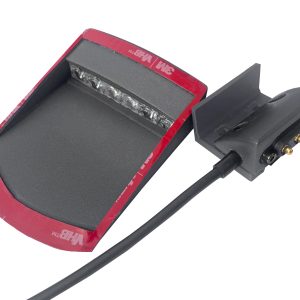
CanopyFlasher – canopy mounted, forward-facing flasher
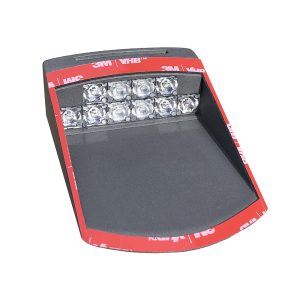
Six extremely bright red CREE™ LEDs built into an elegant, low profile Space Grey (Nextel like) enclosure, mounted in the front of the canopy. CanopyFlasher is made from a high strength, UV resistant ABS based polymer. Out of sight for you, but not for others:
The heart of the CanopyFlasher is the array of 6 extremely bright CREE LED’s emitting approximately 4000-4500 lumens, with powerful, oval lenses; two beams orientated vertically, and 4 beams orientated horizontally. This makes the Flasher well visible at distances of even up to 3500m, ±30 degrees above and below- and up to ±45 degrees left and right of the nose.
The CanopyFlasher system incorporated many safety features, like heat sinks, a temperature sensor to prevent overheat conditions and two status LED’s for indication of the operating modes: AUTO or ON.
This CanopyFlasher + Nexus MINI system is suitable for almost every glider, with canopies opening vertically.
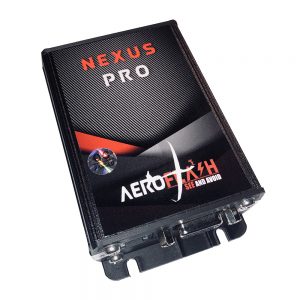
The AeroFlash system comes together with Nexus MINI:


Easy connection to the CanopyFlasher with a DB9 connector and configurable via Micro-USB

Very compact and light-weight

Easy screw-terminal power and switch connection system
Easy Connection
Nexus has an IGC-standard RJ12 port for plug-and-fly connection of a Flarm. Nexus can also be extended with an extra external FuselageFlasher for future expansion. A neat removable screw-terminal system allows a quick connection of the power wires, and easy removal when needed. No need for soldering; everything is plug-and-fly. In case we develop more features in the future, or enhance the flashing logic, there is no need to send the Nexus back to us for service and updates: you can update the Nexus yourself using the Micro-USB port and the AeroFlash configuration/update tool on your PC.
Nexus MINI – connection box – the brain of AeroFLASH
Brilliantly smart and versatile operating modes
AUTO MODE: Connect Nexus to your Flarm to have fully automatic flash activation. When Nexus receives Flarm data, in AUTO-mode it acts as a power-saving mode and constantly calculates if, when and how to flash; of course traffic behind you cannot see the forward CanopyFlasher. Read more about the Flarm and AUTO-logic in the FAQ.
ON MODE: You control when the AeroFlash system is active with “ON-mode”. Potentially dangerous situation, or the whole flight? Switch it ON! Nexus is able to operate as a manually activated device: (always) ON-mode, with added logic to trigger more intensive flashing modes upon receiving Flarm traffic. You can easily change this AUTO/ON-mode with a switch on the instrument panel. No Flarm installed? No problem, Nexus can operate in ON-mode without Flarm, as a stand-alone device.
HAZARD MODE: When extremely hazardous conditions exist where (temporarily) maximum visibility is demanded, Nexus can quickly be entered in a continuous rapid-flashing operation. This generates the maximum available light output and increases the chances of being seen. It basically simulates a continuous Flarm level 3 (highest) warning, for a period of 5 minutes. Plus, you look very cool when you’re doing a low-pass!
Temperature protection
Nexus continuously monitors the temperature of the CanopyFlasher system. If an overheat situation is present, it automatically shuts down the system to prevent damage to the system and to your expensive canopy. After a short cooling the system will restart automatically if conditions permit. Don’t worry, the system generally doesn’t get very warm in flight, but in summer conditions on ground without air flow your glider is well protected.
Red or white LEDs? Your choice…
Let’s explain the pros and cons:
Red:
+ Better visibility of a white glider against a grey/white background. This is the most dangerous situation. Red clearly stands out.
+ Red means danger.
– Slightly less brightness than white LEDs.
White:
+ Slightly better brightness compared to red LEDs.
+ Better visibility against a brown/green background.
– Reduced visibility of a white glider against a grey/white background (in clouds, haziness, snowy terrain, etc).
Conclusion:
We recommend RED. This gives the best result in the most dangerous situations, where it would be very difficult to be seen otherwise.

Nexus MINI with cable set.

CanopyFlasher designed for your specific glider. Cable set/connector shown is a generic “vertical opening canopy” style cable set.

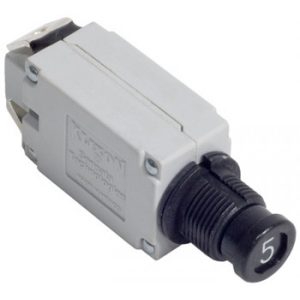
OFF/AUTO/ON -mode switch with label
Scope of Delivery
1x Nexus MINI device.
1x CanopyFlasher with 3M double sided adhesive foam tape pre-applied and cable set.
1x Cable set with OFF/Auto/ON switch.
1x RJ12 – RJ12 1:1 cable 10cm – for connection Nexus-Splitter.
1x RJ12 – RJ12 1:1 cable 50cm – for connection Nexus-Flarm.
1x RJ12 – RJ45 1:1 cable 50cm – for connection Nexus-Flarm.
1x RJ12 – RJ12 Y-Splitter.
1x Micro-USB to USB-A cable, for firmware updates.
1x 15cm 3M Dual Lock adhesive tape for mounting of Nexus.
1x Vinyl template for aligning the CanopyFlasher during installation.
1x OFF/Auto/ON switch marking/label.
Vertical opening canopy – cable harness
Vertical opening – universal
Vertically opening canopies need an easy to attach, but most importantly, easy to DETACH connector. When jettisoning the canopy in case of an emergency, our connectors are designed to easily separate.
The AeroFLASH installation consists of commonly seen male and female DB9 (D SUB 9) type connectors for the data cables (status LEDs and temperature sensor), and for the power supply of the CanopyFlasher. It is sturdy, easy to attach, separate (locking screws removed), and highly suited for the current.
The Flasher cable length is optimized every installation. If required, an extension cable is included.

CanopyFlasher with DB9 connector.

Easy connect, solderless screw-terminal system.
Reviews
There are no reviews yet.